Save article ToRead Archive Delete · Log in Log out
11 min read · View original ·
This article was peer reviewed by Wern Ancheta. Thanks to all of SitePoint’s peer reviewers for making SitePoint content the best it can be!
I’m always yammering on about writing asynchronous PHP code, and for a reason. I think it’s healthy to get fresh perspectives – to be exposed to new programming paradigms.
Asynchronous architecture is common in other programming languages, but it’s only just finding its feet in PHP. The trouble is that this new architecture comes with a cost.
More from this author
I don’t talk about that cost enough.
When I recommend frameworks like Icicle, ReactPHP, and AMPHP, the obvious place to start with them is to create something new. If you have an existing site (perhaps running through Apache or Nginx), adding daemonised PHP services to your app is probably not as easy as just starting over.

It takes a lot of work to integrate new, asynchronous features into existing applications. Often there are good reasons and great benefits, but a rewrite is always a hard-sell. Perhaps you can get some of the benefits of parallel execution without using an event loop. Perhaps you can get some of the benefits of web sockets without a new architecture.
I’m going to show you a Sockets-as-a-Service service, called Socketize. Try saying that a few times, out loud…
Note: Web sockets involve a fair amount of JavaScript. Fortunately, we don’t need to set up any complicated build chains. You can find the example code for this tutorial here.
Setup!
Let’s set up a simple CRUD example. Download the SQL script, and import it to a local database. Then let’s create a JSON endpoint:
$action = "/get";
$actions = ["/get"];

if (isset($_SERVER["PATH_INFO"])) {
    if (in_array($_SERVER["PATH_INFO"], $actions)) {
        $action = $_SERVER["PATH_INFO"];
    }
}

$db = new PDO(
    "mysql:host=localhost;dbname=[your_database_name];charset=utf8",
    "[your_database_username]",
    "[your_database_password]"
);

function respond($data) {
    header("Content-type: application/json");
    print json_encode($data) and exit;
}
This code will decide whether a request is being made against a valid endpoint (currently only supporting /get). We also establish a connection to the database, and define a method for allowing us to respond to the browser with minimal effort. Then we need to define the endpoint for /get:
if ($action == "/get") {
    $statement = $db->prepare("SELECT * FROM cards");
    $statement->execute();

    $rows = $statement->fetchAll(PDO::FETCH_ASSOC);

    $rows = array_map(function($row) {
        return [
            "id" => (int) $row["id"],
            "name" => (string) $row["name"],
        ];
    }, $rows);

    respond($rows);
}
/get is the default action. This is the thing we want this PHP script to do, if nothing else appears to be required. This will actually become more useful as we add functionality. We also define a list of supported actions. You can think of this as a whitelist, to protect the script against strange requests.
Then, we check the PATH_INFO server property. We’ll see (in a bit) where this info comes from. Just imagine it contains the URL path. So, for http://localhost:8000/foo/bar, this variable will contain /foo/bar. If it’s set, and in the array of allowed actions, we override the default action.
Then we define a function for responding to the browser. It’ll set the appropriate JSON content type header, and print a JSON-encoded response, which we can use in the browser.
Then we connect to the database. Your database details will probably be different. Pay close attention to the name of your database, your database username and database password. The rest should be fine as-is.
For the /get action, we fetch all rows from the cards table. Then, for each card, we cast the columns to the appropriate data type (using the array_map function). Finally, we pass these to the respond function.
To run this, and have the appropriate PATH_INFO data, we can use the built-in PHP development server:
$ php -S localhost:8000 server.php
The built-in PHP development server is not good for production applications. Use a proper web server. It’s convenient to use it here, because we don’t need to set up a production server on our local machine to be able to test this code.
At this point, you should be able to see the following in a browser:
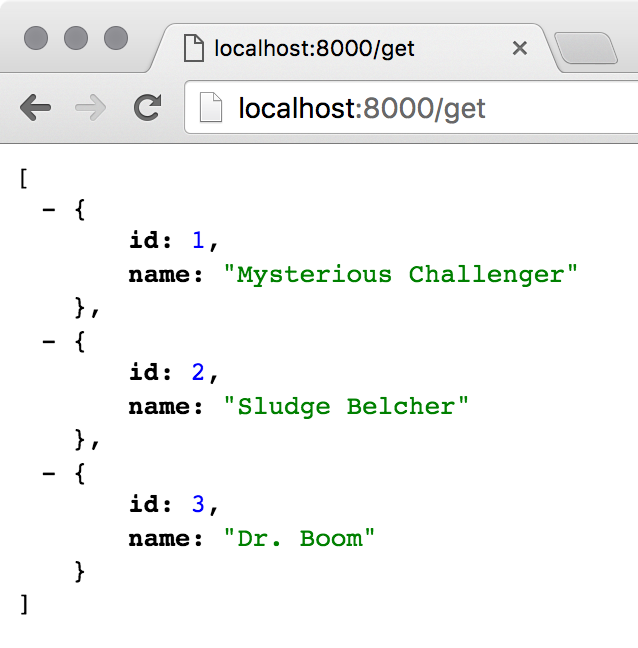
If you’re not seeing this, you probably should try to resolve that before continuing. You’re welcome to use alternative database structures or data, but you’ll need to be careful with the rest of the examples.
Now, let’s make a client for this data:
<!doctype html>
<html lang="en">
    <head>
        <title>Graterock</title>
    </head>
    <body>
        <ol class="cards"></ol>
        <script type="application/javascript">
            fetch("http://localhost:8000/get")
                .then(function(response) {
                    return response.json();
                })
                .then(function(json) {
                    var cards = document.querySelector(".cards");

                    for (var i = 0; i < json.length; i++) {
                        var card = document.createElement("li");
                        card.innerHTML = json[i].name;
                        cards.appendChild(card);
                    }
                });
        </script>
    </body>
</html>
We create an empty .cards list, which we’ll populate dynamically. For that, we use the HTML5 fetch function. It returns promises, which are a compositional pattern for callbacks.
This is just about the most technical part of all of this. I promise it’ll get easier, but if you want to learn more about fetch, check out https://developer.mozilla.org/en/docs/Web/API/Fetch_API. It works in recent versions of Chrome and Firefox, so use those to ensure these examples work!
We can work this client into our PHP server script:
$action = "/index";
$actions = ["/index", "/get"];

// ...

if ($action == "/index") {
    header("Content-type: text/html");
    print file_get_contents("index.html") and exit;
}
Now we can load the client page, and get a list of cards, all from the same script. We don’t even need to change how we run the PHP development server – this should just work!
A case for web sockets
This is all pretty standard PHP/JavaScript stuff. Well, we are using a new JavaScript feature, but it’s pretty much the same as $.ajax.
If we wanted to add realtime functionality to this, there are a few tricks we could try. Say we wanted to add realtime card removal; we could use Ajax requests to remove cards, and Ajax polling to refresh other clients automatically.
This would work, but it would also add significant traffic to our HTTP server (even for duplicate responses).
Alternatively, we could open persistent connections between browsers and the server. We could then push new data from the server, and avoid polling continuously. These persistent connections can be web sockets, but there’s a problem…
PHP was created, and is mostly used, to serve requests quickly. Most scripts and applications aren’t designed to be long-running processes. Because of this, conventional PHP scripts and applications are really inefficient at holding many connections open at once.
This limitation often pushes developers towards other platforms (like NodeJS), or towards new architectures (like those provided by Icicle, ReactPHP, and AMPHP). This is one problem Socketize aims to solve.
Socketize to the rescue!
For brevity, we’re going to use the un-authenticated version of Socketize. This means we’ll be able to read and write data without authenticating each user. Socketize supports authentication, and that’s the recommended (and even preferred) method.
Create a Socketize account, by going to https://socketize.com/register:
Then, go to https://socketize.com/dashboard/member/payload/generate, and generate a key for admin. Note this down. Go to https://socketize.com/dashboard/account/application for your account key (“Public Key”). Now we need to add some new JavaScript to our HTML page:
<script src="https://socketize.com/v1/socketize.min.js"></script>
<script type="application/javascript">
    var params = {
        "public_key": "[your_public_key]",
        "auth_params": {
            "username": "admin",
            "payload": "[your_admin_key]"
        }
    };

    var socketize = new Socketize.client(params);

    socketize.on("login", function(user) {
        var user = socketize.getUser();
        console.log(user);
    });
</script>
If you replace [your_public_key] and [your_admin_key] with the appropriate keys, and refresh the page, you should see a console message: “[Socketize] Connection established!”. You should also see an object describing the Socketize user account which is logged in. Note the user id.
What does this mean? Our HTML page is now connected to the Socketize database (for our account). We can read and write from named lists of messages. Let’s change our server script to write the initial list of cards to a named Socketize list. All Socketize API requests take the form of:
curl "https://socketize.com/api/[method]?[parameters]"
    -u [your_public_key]:[your_private_key]
    -H "Accept: application/vnd.socketize.v1+json"
We can create a request function, to simplify this process:
function request($method, $endpoint, $parameters = "")
{
    $public = "[your_public_key]";
    $private = "[your_private_key]";

    $auth = base64_encode("{$public}:{$private}");

    $context = stream_context_create([
        "http" => [
            "method" => $method,
            "header" => [
                "Authorization: Basic {$auth}",
                "Accept: application/vnd.socketize.v1+json",
            ]
        ]
    ]);

    $url = "https://socketize.com/api/{$endpoint}?{$parameters}";
    $response = file_get_contents($url, false, $context);

    return json_decode($response, true);
}
This method abstracts the common code for using the endpoints we’ve set up. We can see it in action, with the following requests:
$json = json_encode([
    "id" => 1,
    "name" => "Mysterious Challenger",
]);

request(
    "PUT",
    "push_on_list",
    "key=[your_user_id]:cards&value={$json}"
);

request(
    "GET",
    "get_list_items",
    "key=[your_user_id]:cards"
);
It’s probably best to use a robust HTTP request library, like GuzzlePHP, to make requests to third-party services. There’s also an official PHP SDK at: https://github.com/socketize/rest-php, but I prefer just to use these concise methods against the JSON API.
The request function takes an HTTP request method, Socketize API endpoint and query-string parameter. You’ll need to replace [your_public_key], [your_private_key], and [your_user_id] with the correct values. The two example calls should then work for you. cards is the name of the list to which we write this card object. You can think of Socketize like an HTTP version of an object store.
We can adjust our HTML page to pull items from this list. While we’re at it, we can add a button to remove unwanted cards:
var socketize = new Socketize.client(params);
var cards = document.querySelector(".cards");

cards.addEventListener("click", function(e){
    if (e.target.matches(".card .remove")) {
        e.stopPropagation();
        e.preventDefault();

        socketize.publish("removed", e.target.dataset._id);
        socketize.updateListItem("cards", null, e.target.dataset._id);
    }
});

socketize.subscribe("removed", function(_id) {
    var items = document.querySelectorAll(".card");

    for (var i = 0; i < items.length; i++) {
        if (items[i].dataset._id == _id) {
            items[i].remove();
        }
    }
});

socketize.on("login", function(user) {
    var user = socketize.getUser();

    socketize.getListItems("cards")
        .then(function(json) {
            for (var i = 0; i < json.length; i++) {
                var name = document.createElement("span");
                name.className = "name";
                name.innerHTML = json[i].name;

                var remove = document.createElement("a");
                remove.dataset._id = json[i]._id;
                remove.innerHTML = "remove";
                remove.className = "remove";
                remove.href = "#";

                var card = document.createElement("li");
                card.dataset._id = json[i]._id;
                card.className = "card";
                card.appendChild(name);
                card.appendChild(remove);

                cards.appendChild(card);
            }
        });
});
The match method works in recent versions of Chrome and Firefox. It’s not the only way to do it, but it is much cleaner than the alternative.
In this example, we add a click event listener, intercepting clicks on .remove elements. This is called event delegation, and it’s super efficient! This way we don’t have to worry about removing event listeners on each .remove element.
Each time a .remove element is clicked, we trigger an update to the Socketize list. At the same time, we publish a removal event. We also listen for removal events, so that we can update our list if other users remove cards.
We can update the dataset properties of elements. These are the JavaScript representation of data-* HTML attributes. This way, we can store the Socketize _id of each card. Finally, we adjust the code to create new elements, and append the generated elements to the .cards element.
Where do we go from here?
This tiny example should illustrate how to begin doing useful stuff with Socketize. We added web socket communication (reading and writing to named lists, and publishing ad-hoc types of events). What’s awesome is that we did this without significantly altering our server-side code. We didn’t have to re-write for an event-loop. We just added a function or two, and we could push events to the browser.
Think of the interesting things you could do with this. Every time you save a database record, you can push an event to the browser. You can connect gamers to each other. You can alert conference speakers when they are close to attendees with questions. All of this in a traditional PHP codebase.
If you want to get better at this stuff, perhaps consider making an interface for adding and reordering cards. If you have questions, or can think of other interesting uses for this kind of persistent communication; leave a comment below.